Connect using REST APIs
REST APIs provide an effective means of interacting with your Orama Cloud index.
The REST APIs allow you to update, insert, and remove data from your index seamlessly. The system then queues these changes until you request a new deployment.
This guide will show you how to use the REST APIs data source, to deploy and manage your indexes on Orama Cloud.
Creating an index
Firstly, create a new index using “REST API” as a data source. You’ll find it under “custom integrations”.
Insert a name and optionally add a description for your index, then click on “Create index”.
After creating it, you will need to define the searchable properties schema.
Define the schema
For this guide, we will use a very simple schema, which consists of two simple properties: "name" (of type string) and "age" (of type number).
Define the schema of the searchable properties of your document.
Automatic embeddings generation are included in your index, to perform vector and hybrid search on it. By default, all the string properties are included in the embeddings generation.
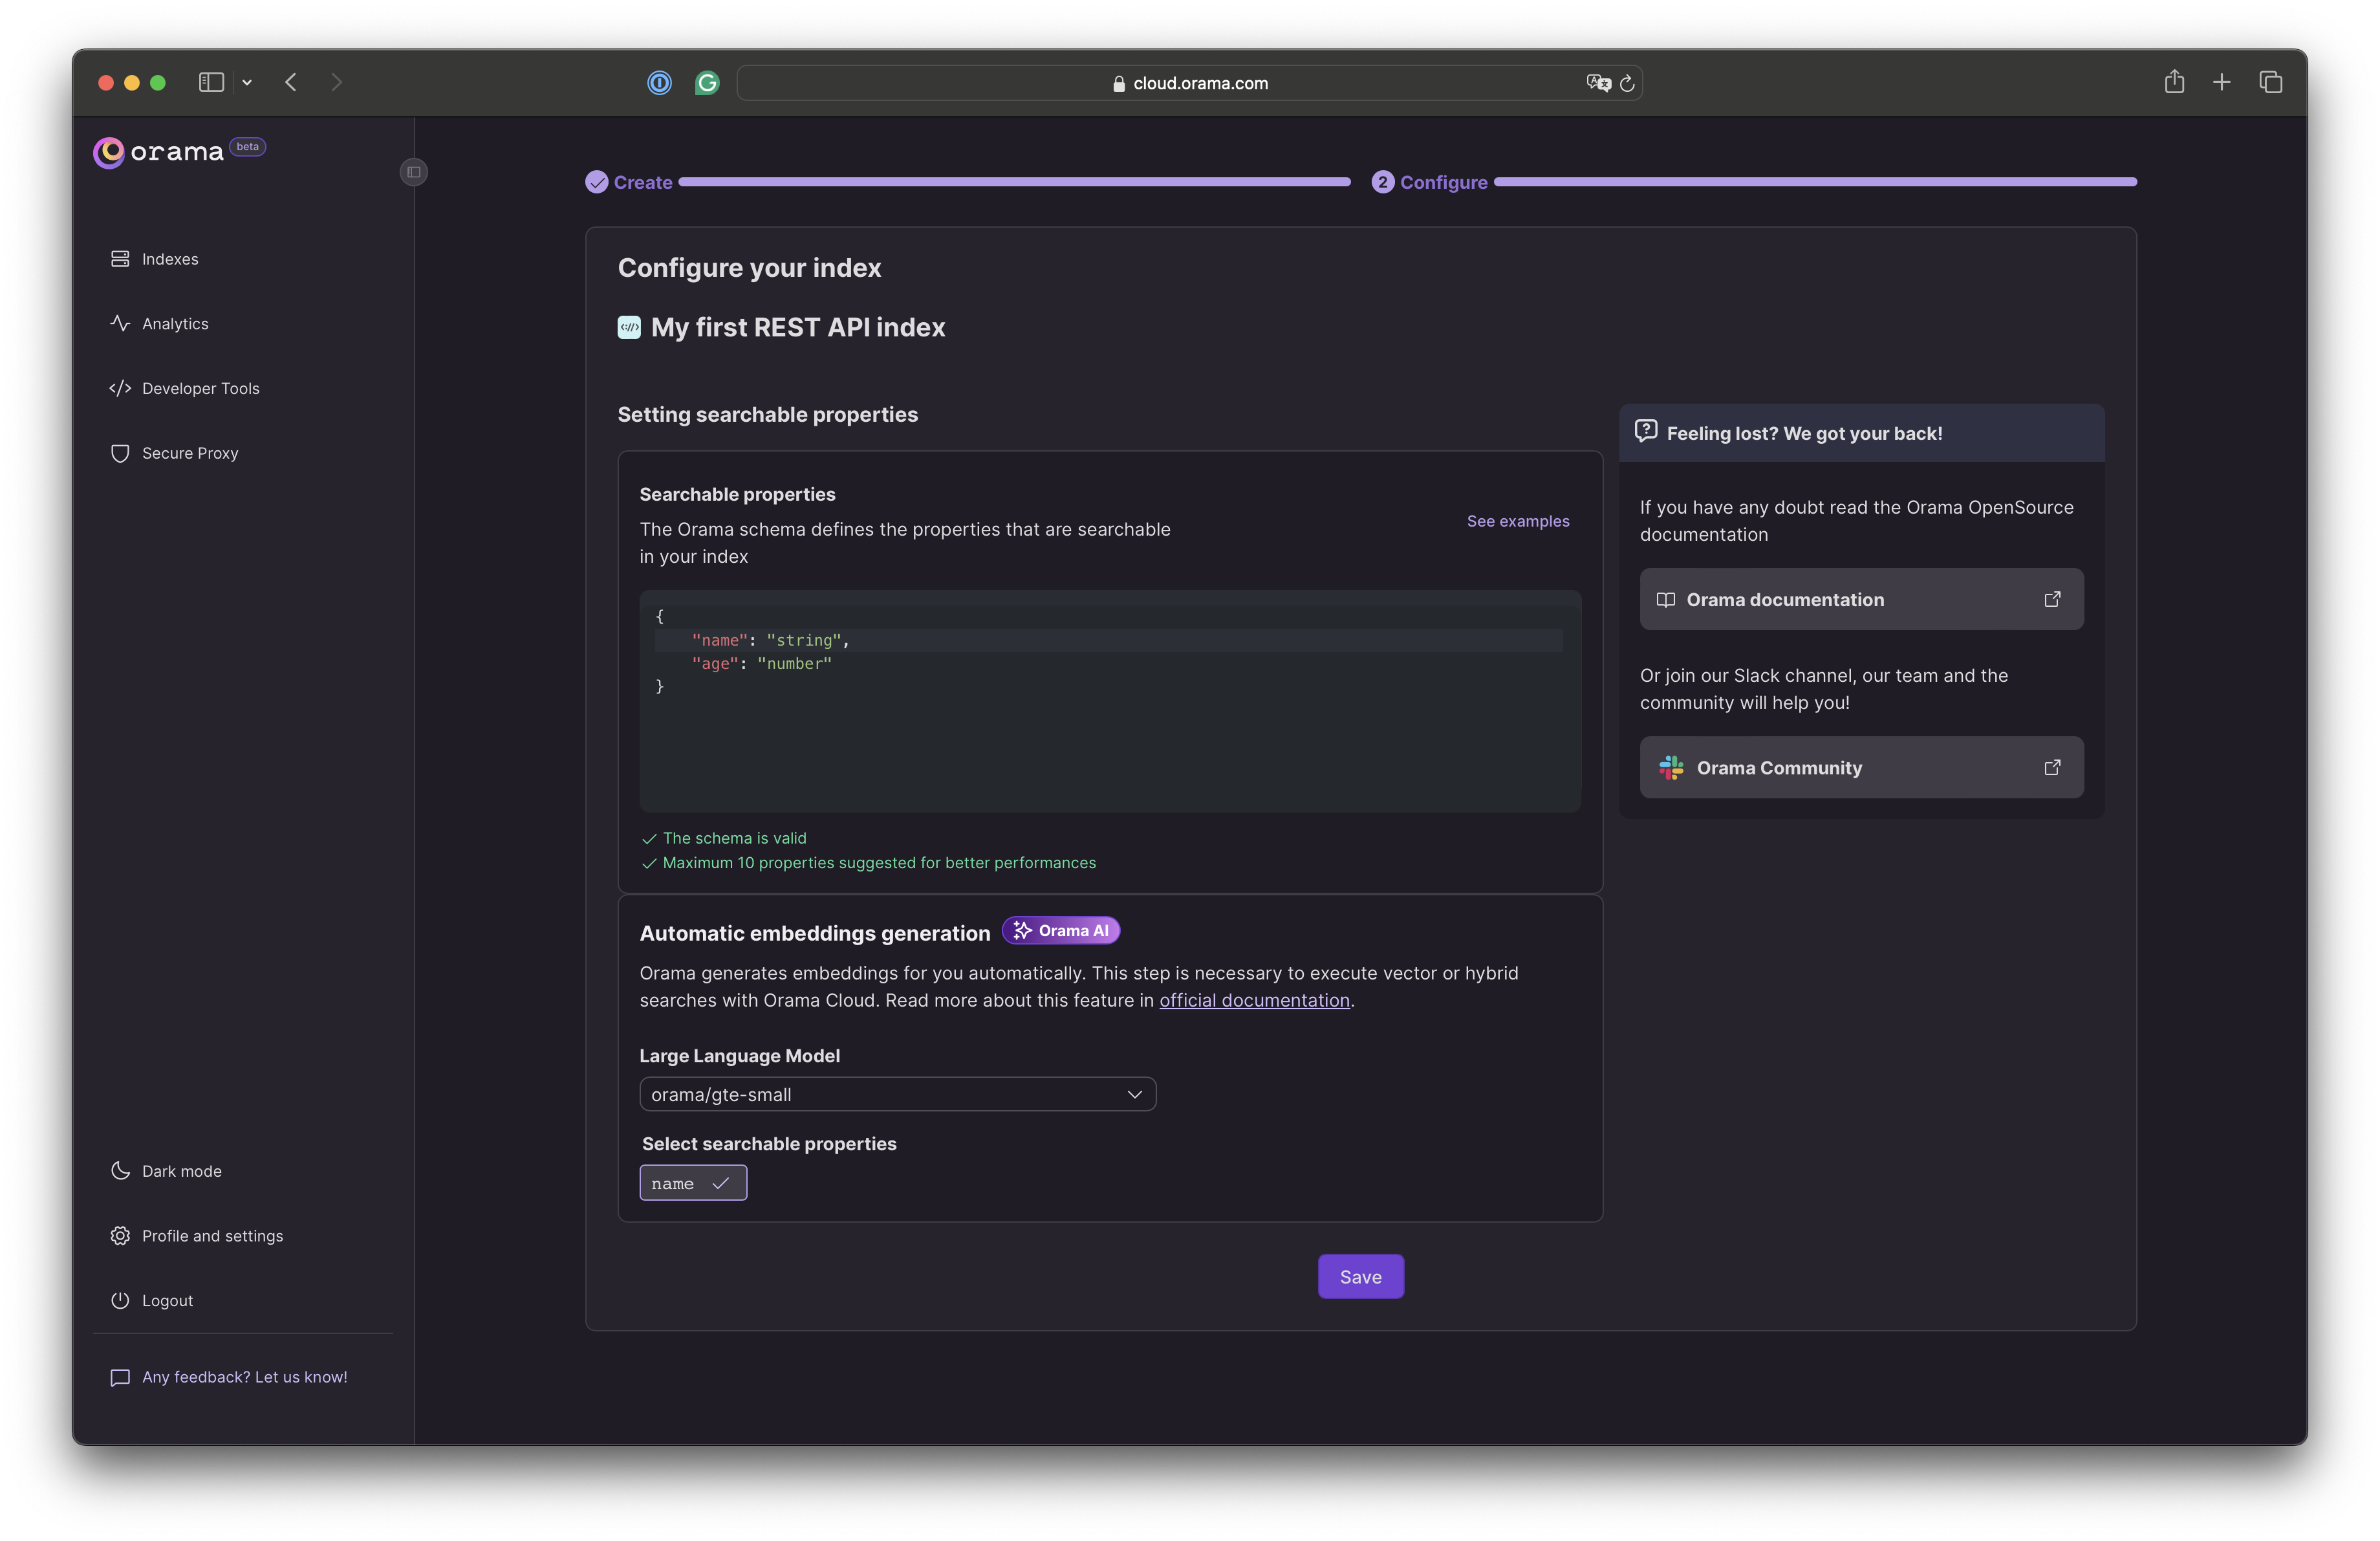
After we complete this step, we can save the configuration by clicking on “Save”.
This will bring us to the following screen, where we can find some instructions on how to deploy and update an index via REST APIs.
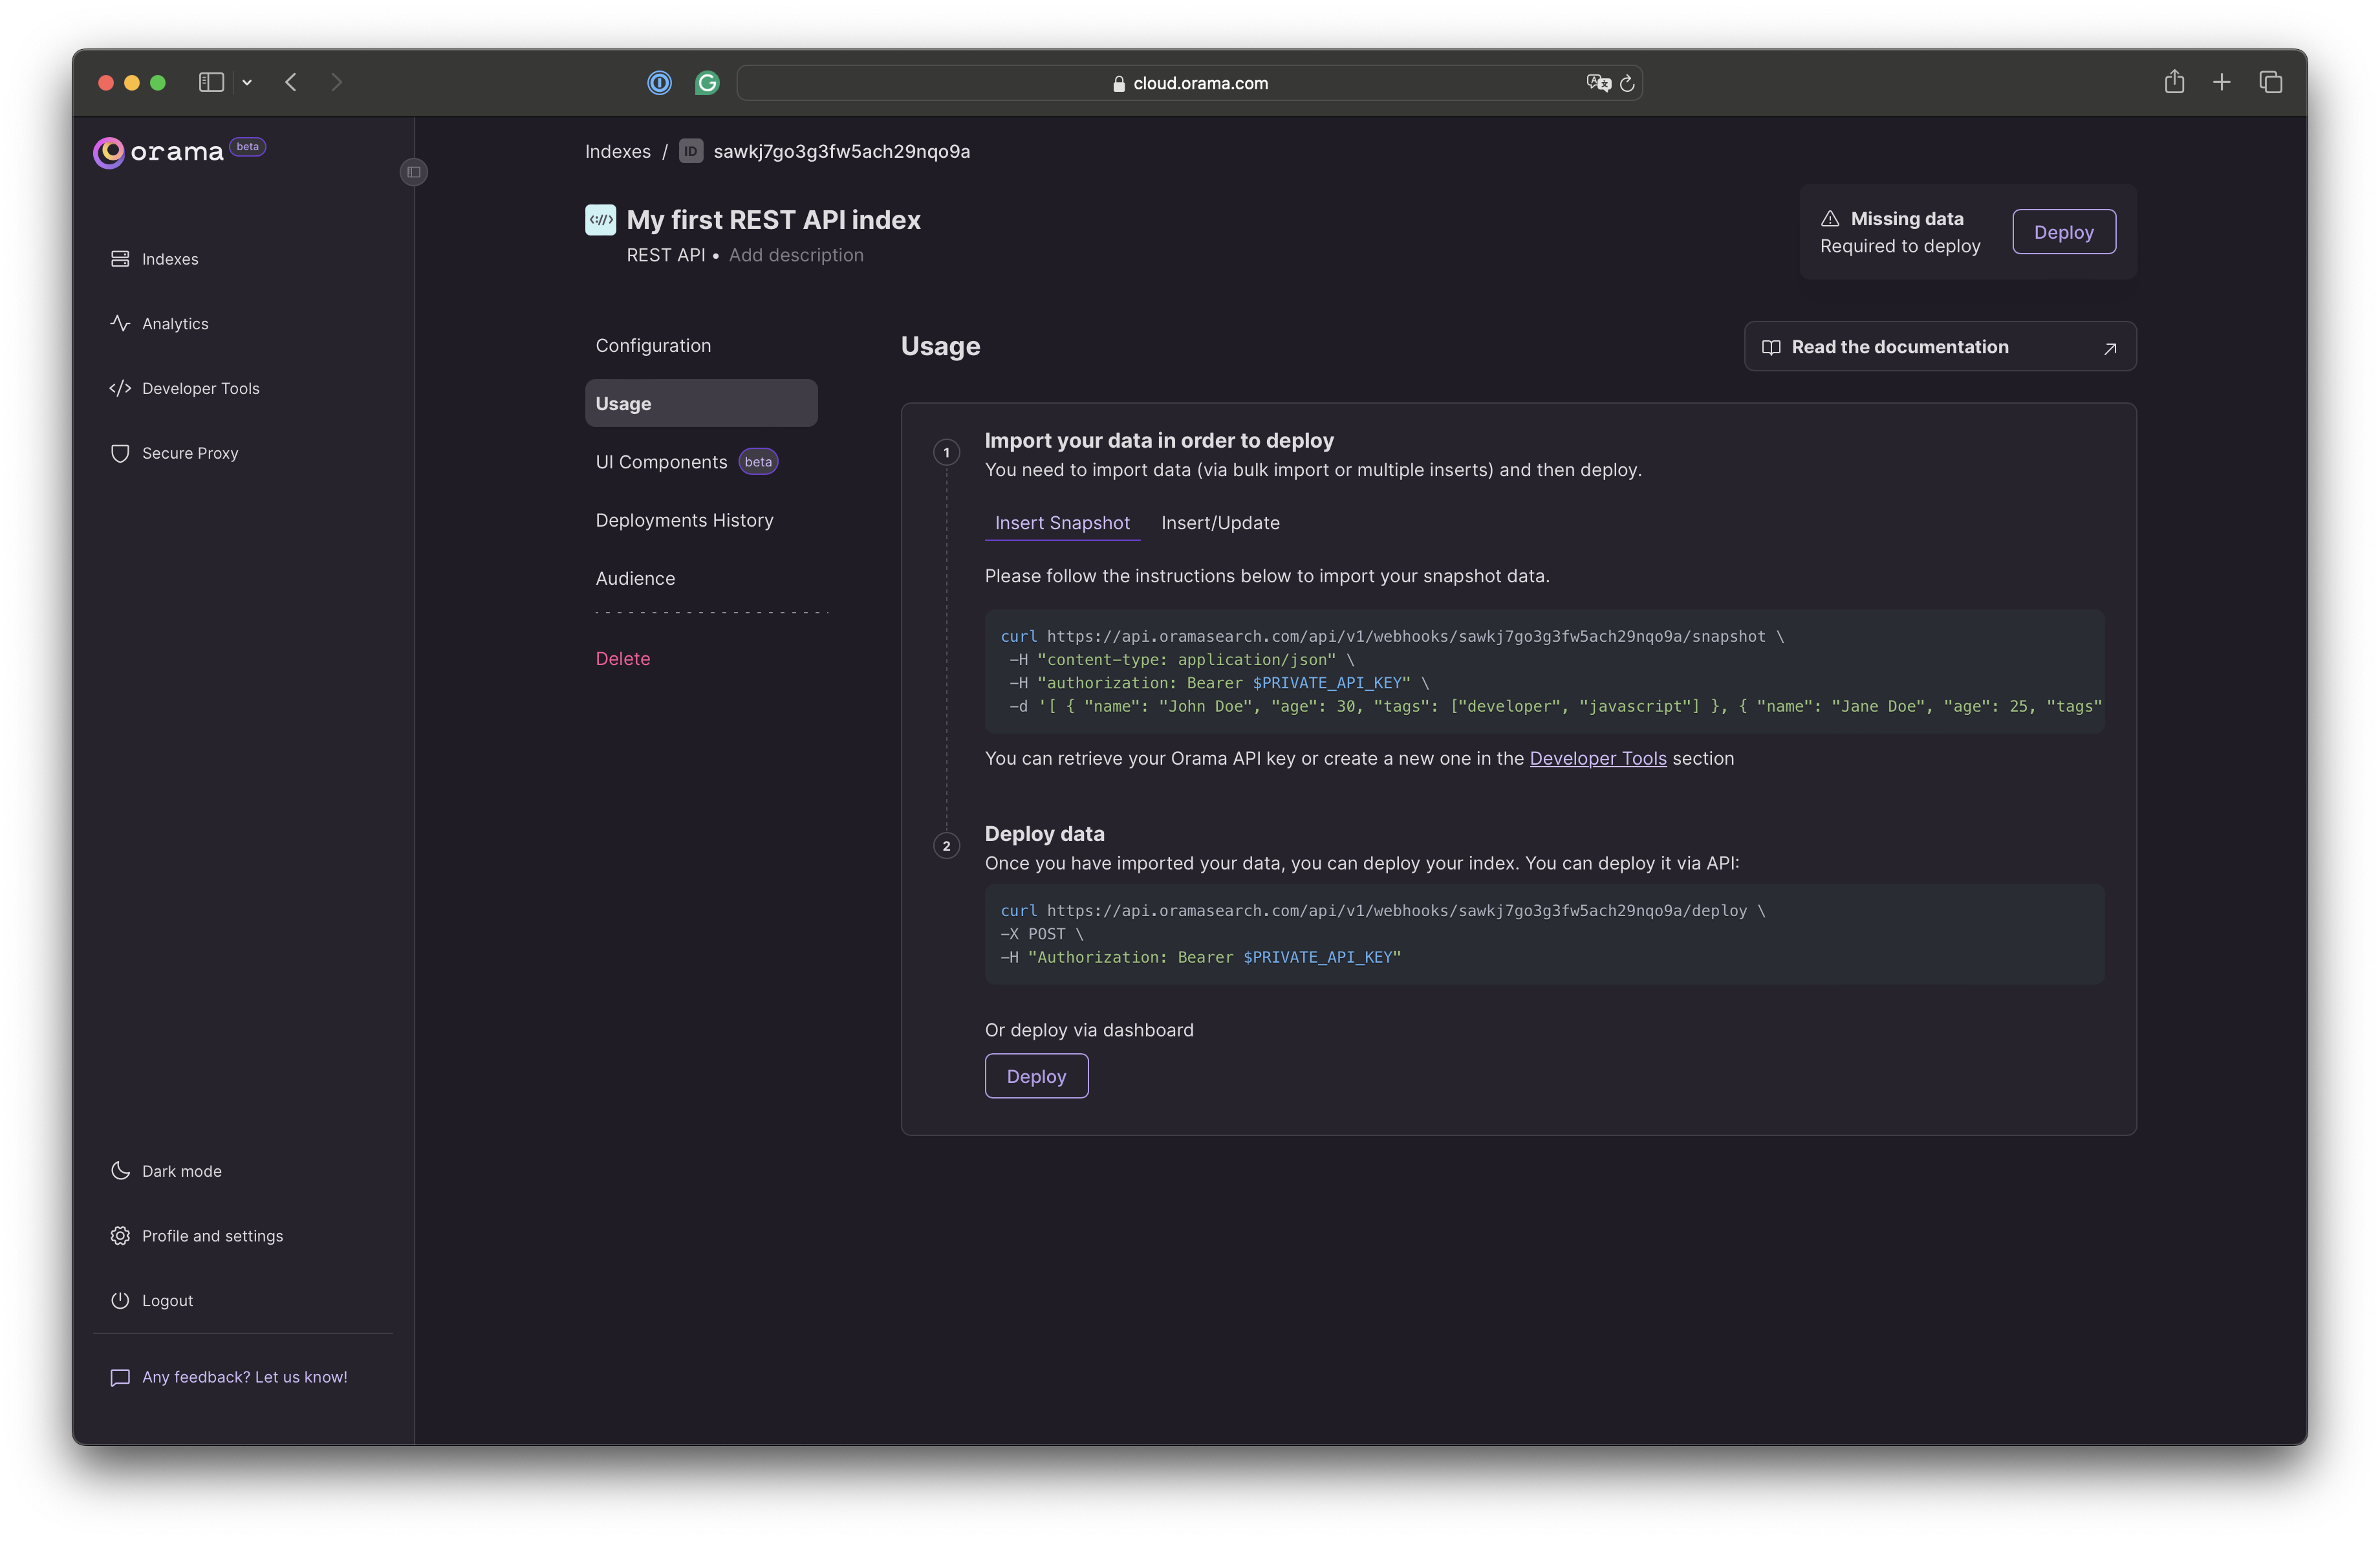
From here, you can use the Official SDKs to manage your index data.
Generate a Private API Key
To use the REST APIs, you will need to generate a private API key. You can do this in the developer tools section of the dashboard.
Simply add a new private key by clicking on Generate API Key and providing a name and an optional description for it. A single private API key can be used to manage multiple indexes.
Managing your index
Now that you have created an index, you can start managing it using the REST APIs.
Here is a list of the available methods.
- Inserting a snapshot
- Inserting, updating and removing documents
- Deploying the index
- Clearing the index on next deployment
- Check for pending operations
You can integrate with the REST APIs using the Official SDKs or by making direct HTTP requests.
The official SDKs supported languages are JavaScript, Swift, Kotlin, PHP, and Python. In the following examples, we will also include a cURL example.
Inserting a snapshot
A snapshot is a complete override of a given index. It means you bulk upload a number of documents, which entirely substitute the live index all at once.
For example, if you want your live index to only contain the two following documents:
[ { "id": "1", "name": "John Doe", "age": 30 }, { "id": "2", "name": "Jane Doe", "age": 25 }]You can use the snapshot API to bulk update the live index:
import { CloudManager } from "@oramacloud/client"
const oramaCloudManager = new CloudManager({  api_key: process.env.ORAMA_CLOUD_PRIVATE_API_KEY,})
const myIndex = oramaCloudManager.index("my-index-id")
await myIndex.snapshot([  { id: "1", name: "John Doe", age: 30 },  { id: "2", name: "Jane Doe", age: 25 },])
import OramaCloudClient
// This is an example document. It should reflect your index schema.struct OramaDoc: Codable { let id: String let name: String let age: Int}
let cloudManager = CloudManager(apiKey: "YOUR_API_KEY")let indexManager = cloudManager.index<OramaDoc>("my-index-id")
await try indexManager.snapshot([ OramaDoc(id: "1", name: "John Doe", age: 30), OramaDoc(id: "2", name: "Jane Doe", age: 25)])import com.orama.client.CloudManagerimport kotlinx.coroutines.runBlockingimport kotlinx.serialization.Serializable
@Serializabledata class OramaDoc ( let id: String let name: String let age: Int)
val cloudManager = CloudManager(apiKey = "YOUR_API_KEY")val indexManager = cloudManager.index<Product>(indexId)
runBlocking { val snapshot = index.snapshot(listOf( OramaDoc(id = "1", name = "John Doe", age = 30), OramaDoc(id = "2", name = "Jane Doe", age = 25) ), OramaDoc.serializer())}use OramaCloud\Manager\IndexManager;$indexManager = new IndexManager("my-index-id", PRIVATE_API_KEY);
$indexManager->insert([ ["id" => "1", "name" => "John Doe", "age" => 30], ["id" => "2", "name" => "Jane Doe", "age" => 25],]);curl https://api.oramasearch.com/api/v1/webhooks/$INDEX_ID/snapshot \ -H "authorization: Bearer $PRIVATE_API_KEY" ] -d "[ { "id": "1", "name": "John Doe", "age": 30 }, { "id": "2", "name": "Jane Doe", "age": 25 } ]"Insert, update and remove
While the snapshot API is convenient for replacing a live index with a new one, there may be instances where you only want to change some documents, inserting, updating, and deleting ones.
This is where the notify API becomes really convenient.
Let”s say you want to add a new document:
{ "id": "3", "name": "Rick Sanchez", "age": 80}you can use the notify API to put that operation in queue for the next deployment:
import { CloudManager } from "@oramacloud/client"
const oramaCloudManager = new CloudManager({  api_key: process.env.ORAMA_CLOUD_PRIVATE_API_KEY,})
const myIndex = oramaCloudManager.index("my-index-id")
await myIndex.insert([{ id: "3", name: "Rick Sanchez", age: 80 }])await myIndex.update([{ id: "3", name: "Rick Doe", age: 75 }])
import OramaCloudClient
// This is an example document. It should reflect your index schema.struct OramaDoc: Codable { let id: String let name: String let age: Int}
let cloudManager = CloudManager(apiKey: "YOUR_API_KEY")let indexManager = cloudManager.index<OramaDoc>("my-index-id")
await try indexManager.insert([OramaDoc(id: "3", name: "Rick Sanchez", age: 80)])await try indexManager.update([OramaDoc(id: "3", name: "Rick Doe", age: 75)])import com.orama.client.CloudManagerimport kotlinx.coroutines.runBlockingimport kotlinx.serialization.Serializable
@Serializabledata class OramaDoc ( let id: String let name: String let age: Int)
val cloudManager = CloudManager(apiKey = "YOUR_API_KEY")val indexManager = cloudManager.index<OramaDoc>(indexId)
runBlocking { index.insert(listOf( OramaDoc(id = "3", name = "Rick Sanchez", age = 80) ), OramaDoc.serializer())
index.update(listOf( OramaDoc(id = "3", name = "Rick Doe", age = 75) ), OramaDoc.serializer())}use OramaCloud\Manager\IndexManager;$indexManager = new IndexManager("my-index-id", PRIVATE_API_KEY);
$indexManager->insert([ ["id" => "3", "name" => "Rick Sanchez", "age" => 80]]);$indexManager->update([ ["id" => "3", "name" => "Rick Doe", "age" => 75]]);curl https://api.oramasearch.com/api/v1/webhooks/$INDEX_ID/notify \ -H "authorization: Bearer $PRIVATE_API_KEY" \ -d "{ "upsert": [{ "id": "3", "name": "Rick Sanchez", "age": 80 }] }"As you can see, you”ll need to pass an array of objects to an upsert operation (which will do that based on the id field). If Orama finds that document, it will update it; otherwise, it will insert a new one.
You can also remove an existing document using the remove operation. For example, this is how you can remove the document with id "2":
import { CloudManager } from "@oramacloud/client"
const oramaCloudManager = new CloudManager({  api_key: process.env.ORAMA_CLOUD_PRIVATE_API_KEY,})
const myIndex = oramaCloudManager.index("my-index-id")
await myIndex.delete(["2"])
import OramaCloudClient
// This is an example document. It should reflect your index schema.struct OramaDoc: Codable { let id: String let name: String let age: Int}
let cloudManager = CloudManager(apiKey: "YOUR_API_KEY")let indexManager = cloudManager.index<OramaDoc>("my-index-id")
await try indexManager.delete(["2"])import com.orama.client.CloudManagerimport kotlinx.coroutines.runBlockingimport kotlinx.serialization.Serializable
@Serializabledata class OramaDoc ( let id: String let name: String let age: Int)
val cloudManager = CloudManager(apiKey = "YOUR_API_KEY")val indexManager = cloudManager.index<OramaDoc>(indexId)
runBlocking { index.delete(listOf("2"), OramaDoc.serializer())}use OramaCloud\Manager\IndexManager;$indexManager = new IndexManager("my-index-id", PRIVATE_API_KEY);
$indexManager->delete(["2"]);curl https://api.oramasearch.com/api/v1/webhooks/$INDEX_ID/notify \ -H "authorization: Bearer $PRIVATE_API_KEY" \ -d "{ "remove": ["2"] }"Deploying the index
After you have inserted a snapshot or put a number of insert, remove, or update operations in the queue, you have to deploy a new version of the index.
import { CloudManager } from "@oramacloud/client"
const oramaCloudManager = new CloudManager({  api_key: process.env.ORAMA_CLOUD_PRIVATE_API_KEY,})
const myIndex = oramaCloudManager.index("my-index-id")
await myIndex.deploy()
import OramaCloudClient
// This is an example document. It should reflect your index schema.struct OramaDoc: Codable { let id: String let name: String let age: Int}
let cloudManager = CloudManager(apiKey: "YOUR_API_KEY")let indexManager = cloudManager.index<OramaDoc>("my-index-id")
await try indexManager.deploy()import com.orama.client.CloudManagerimport kotlinx.coroutines.runBlockingimport kotlinx.serialization.Serializable
@Serializabledata class OramaDoc ( let id: String let name: String let age: Int)
val cloudManager = CloudManager(apiKey = "YOUR_API_KEY")val indexManager = cloudManager.index<OramaDoc>(indexId)
runBlocking { index.deploy()}use OramaCloud\Manager\IndexManager;$indexManager = new IndexManager("my-index-id", PRIVATE_API_KEY);
$indexManager->deploy();curl https://api.oramasearch.com/api/v1/webhooks/$INDEX_ID/deploy \ -X POST \ -H "Authorization: Bearer $PRIVATE_API_KEY"This will trigger a new deployment and will make the new index available worldwide in just a few minutes.
Clearing the index data
Sometimes, you may want to re-insert all the documents in the index and to do that, you will first need to tell Orama to clear the index for the next deployment.
You can do that by using the clear API, or by creating an empty snapshot:
import { CloudManager } from "@oramacloud/client"
const oramaCloudManager = new CloudManager({  api_key: process.env.ORAMA_CLOUD_PRIVATE_API_KEY,})
const myIndex = oramaCloudManager.index("my-index-id")
await myIndex.clear()
import OramaCloudClient
// This is an example document. It should reflect your index schema.struct OramaDoc: Codable { let id: String let name: String let age: Int}
let cloudManager = CloudManager(apiKey: "YOUR_API_KEY")let indexManager = cloudManager.index<OramaDoc>("my-index-id")
await try indexManager.clear()import com.orama.client.CloudManagerimport kotlinx.coroutines.runBlockingimport kotlinx.serialization.Serializable
@Serializabledata class OramaDoc ( let id: String let name: String let age: Int)
val cloudManager = CloudManager(apiKey = "YOUR_API_KEY")val indexManager = cloudManager.index<OramaDoc>(indexId)
runBlocking { index.clear()}// coming sooncurl https://api.oramasearch.com/api/v1/webhooks/$INDEX_ID/snapshot \ -H "authorization: Bearer $PRIVATE_API_KEY" ] -d "[]"This will clear the index, making the next deployment start from empty status. You can then notify some operations to update the index. This ensures that old data is not present in the index anymore.
Check for pending operations
If you lost track of the operatiosn you ran via the SDK or APIs, you can always check if there are pending operations in the queue by using the hasPendingOperations API:
import { CloudManager } from "@oramacloud/client"
const oramaCloudManager = new CloudManager({  api_key: process.env.ORAMA_CLOUD_PRIVATE_API_KEY,})
const myIndex = oramaCloudManager.index("my-index-id")
const hasPendingOperations = await myIndex.hasPendingOperations()console.log(hasPendingOperations) // true or false
import OramaCloudClient
// This is an example document. It should reflect your index schema.struct OramaDoc: Codable { let id: String let name: String let age: Int}
let cloudManager = CloudManager(apiKey: "YOUR_API_KEY")let indexManager = cloudManager.index<OramaDoc>("my-index-id")
let hasPendingOperations = await try indexManager.hasPendingOperations()
print(hasPendingOperations) // true or falseimport com.orama.client.CloudManagerimport kotlinx.coroutines.runBlockingimport kotlinx.serialization.Serializable
@Serializabledata class OramaDoc ( let id: String let name: String let age: Int)
val cloudManager = CloudManager(apiKey = "YOUR_API_KEY")val indexManager = cloudManager.index<OramaDoc>(indexId)
runBlocking { val hasPendingOperations = index.hasPendingOperations() println(hasPendingOperations) // true or false}// coming soon# Beware: this API will be renamed to "/has-pending-operations" in the future.# We recommend using the SDK instead.curl https://api.oramasearch.com/api/v1/webhooks/$INDEX_ID/has-data \ -H "authorization: Bearer $PRIVATE_API_KEY" ]Integrating into your app
Now that you have your index deployed, you can start using it in your application's frontend.
You can install a ready-to-use Web Component to your site, like the Search Box, which is framework agnostic and can be used in any JavaScript environment.
You can also install the JavaScript SDK to build your own searching experience.