User Segmentation
User segmentation is a feature that allows you to create and manage user segments based on user attributes, events, or other criteria.
You can then use these segments to target users with personalized answers, content, campaigns, or other actions.
In the following guide, we’ll be exploring how to create user segments for three different Personas: Evaluator, Buyer, and Gamer.
If you’re new to the concept of “Personas”, we recommend reading the interaction-design.org guide Personas – A Simple Introduction .
Introduction to segments
Once you create an index and set up the answer engine, you may realize that you’d like to give different users different answers based on their behavior or attributes.
For example, you may want to prompt a user to sign up for a newsletter if they keep asking for your product’s latest updates. Or you may want to convert a user into a subscriber if they’ve asked about your pricing multiple times.
This is where user segments come in. You can create a segment for each of these user types and then use these segments to trigger different answers or actions based on the user’s behavior.
In our example, we have a database of NES games and we want to create three user segments: Evaluator, Buyer, and Gamer.
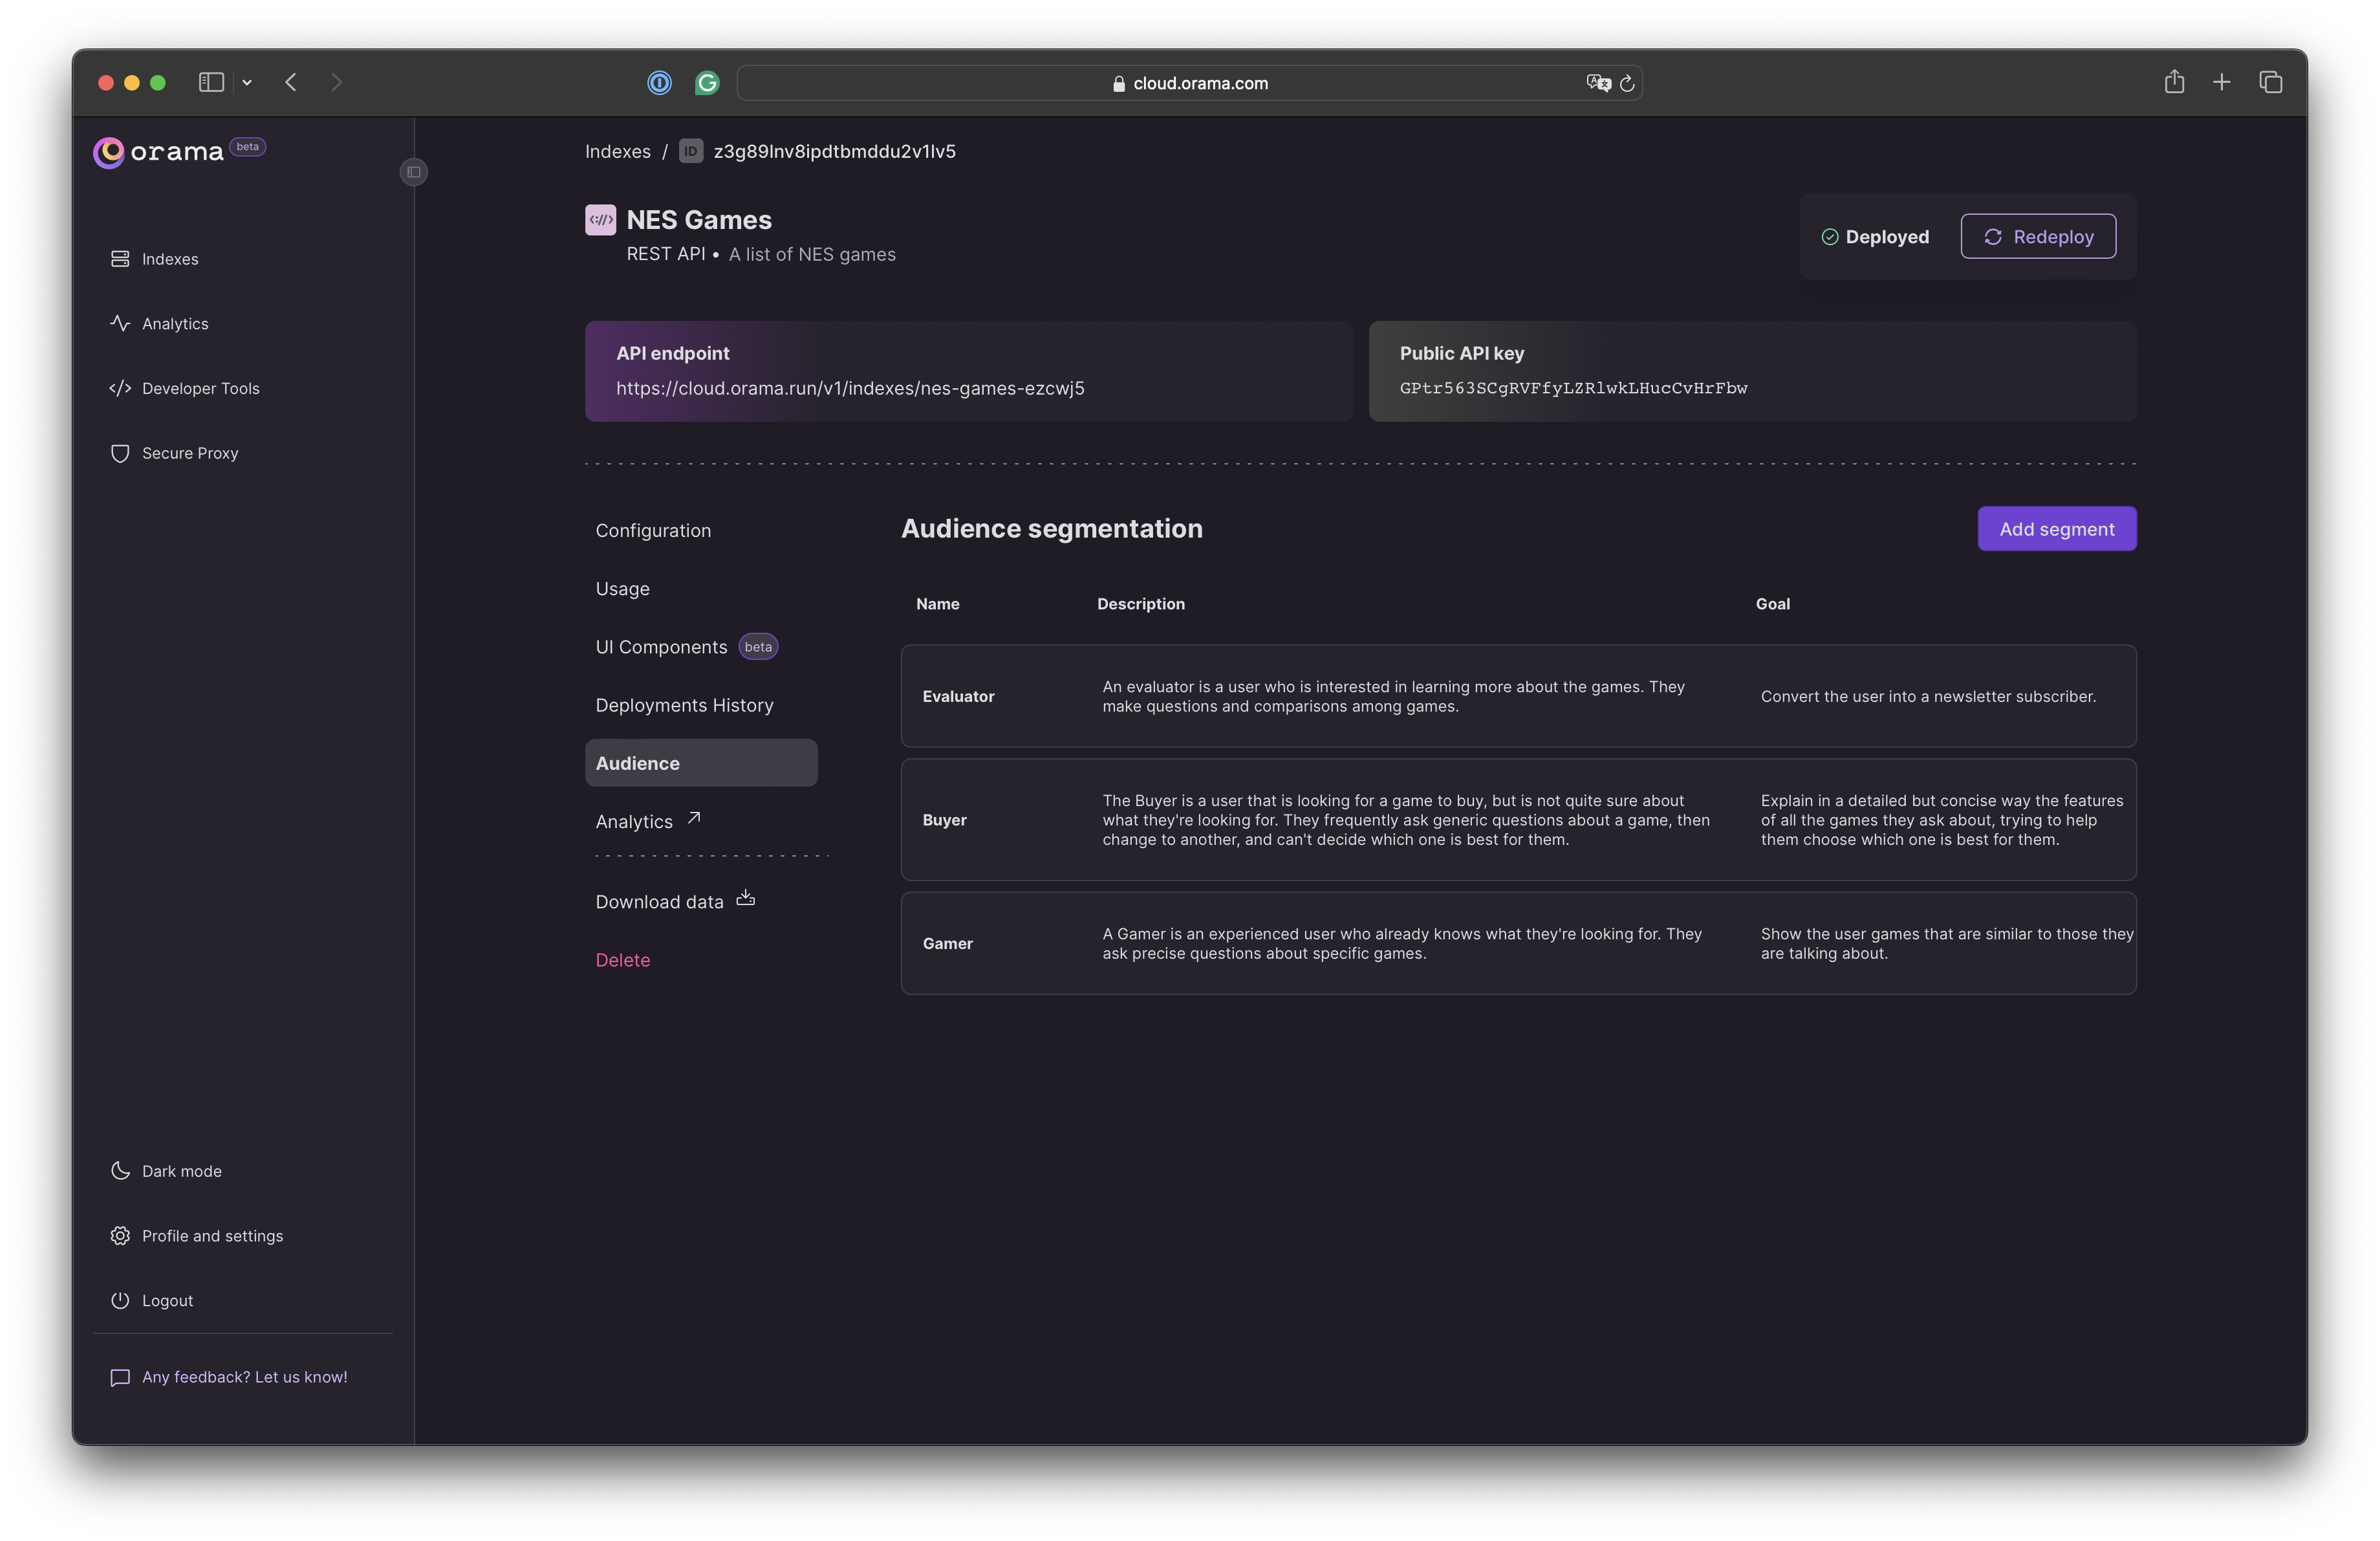
- Evaluator: Users who are interested in learning more about the games.
- Buyer: Users who are interested in purchasing the games.
- Gamer: Users who are interested in playing the games.
If you want to follow along with this guide, you can create an index following the REST API guide, which will allow you to use the same data source and schema as we do in this guide.
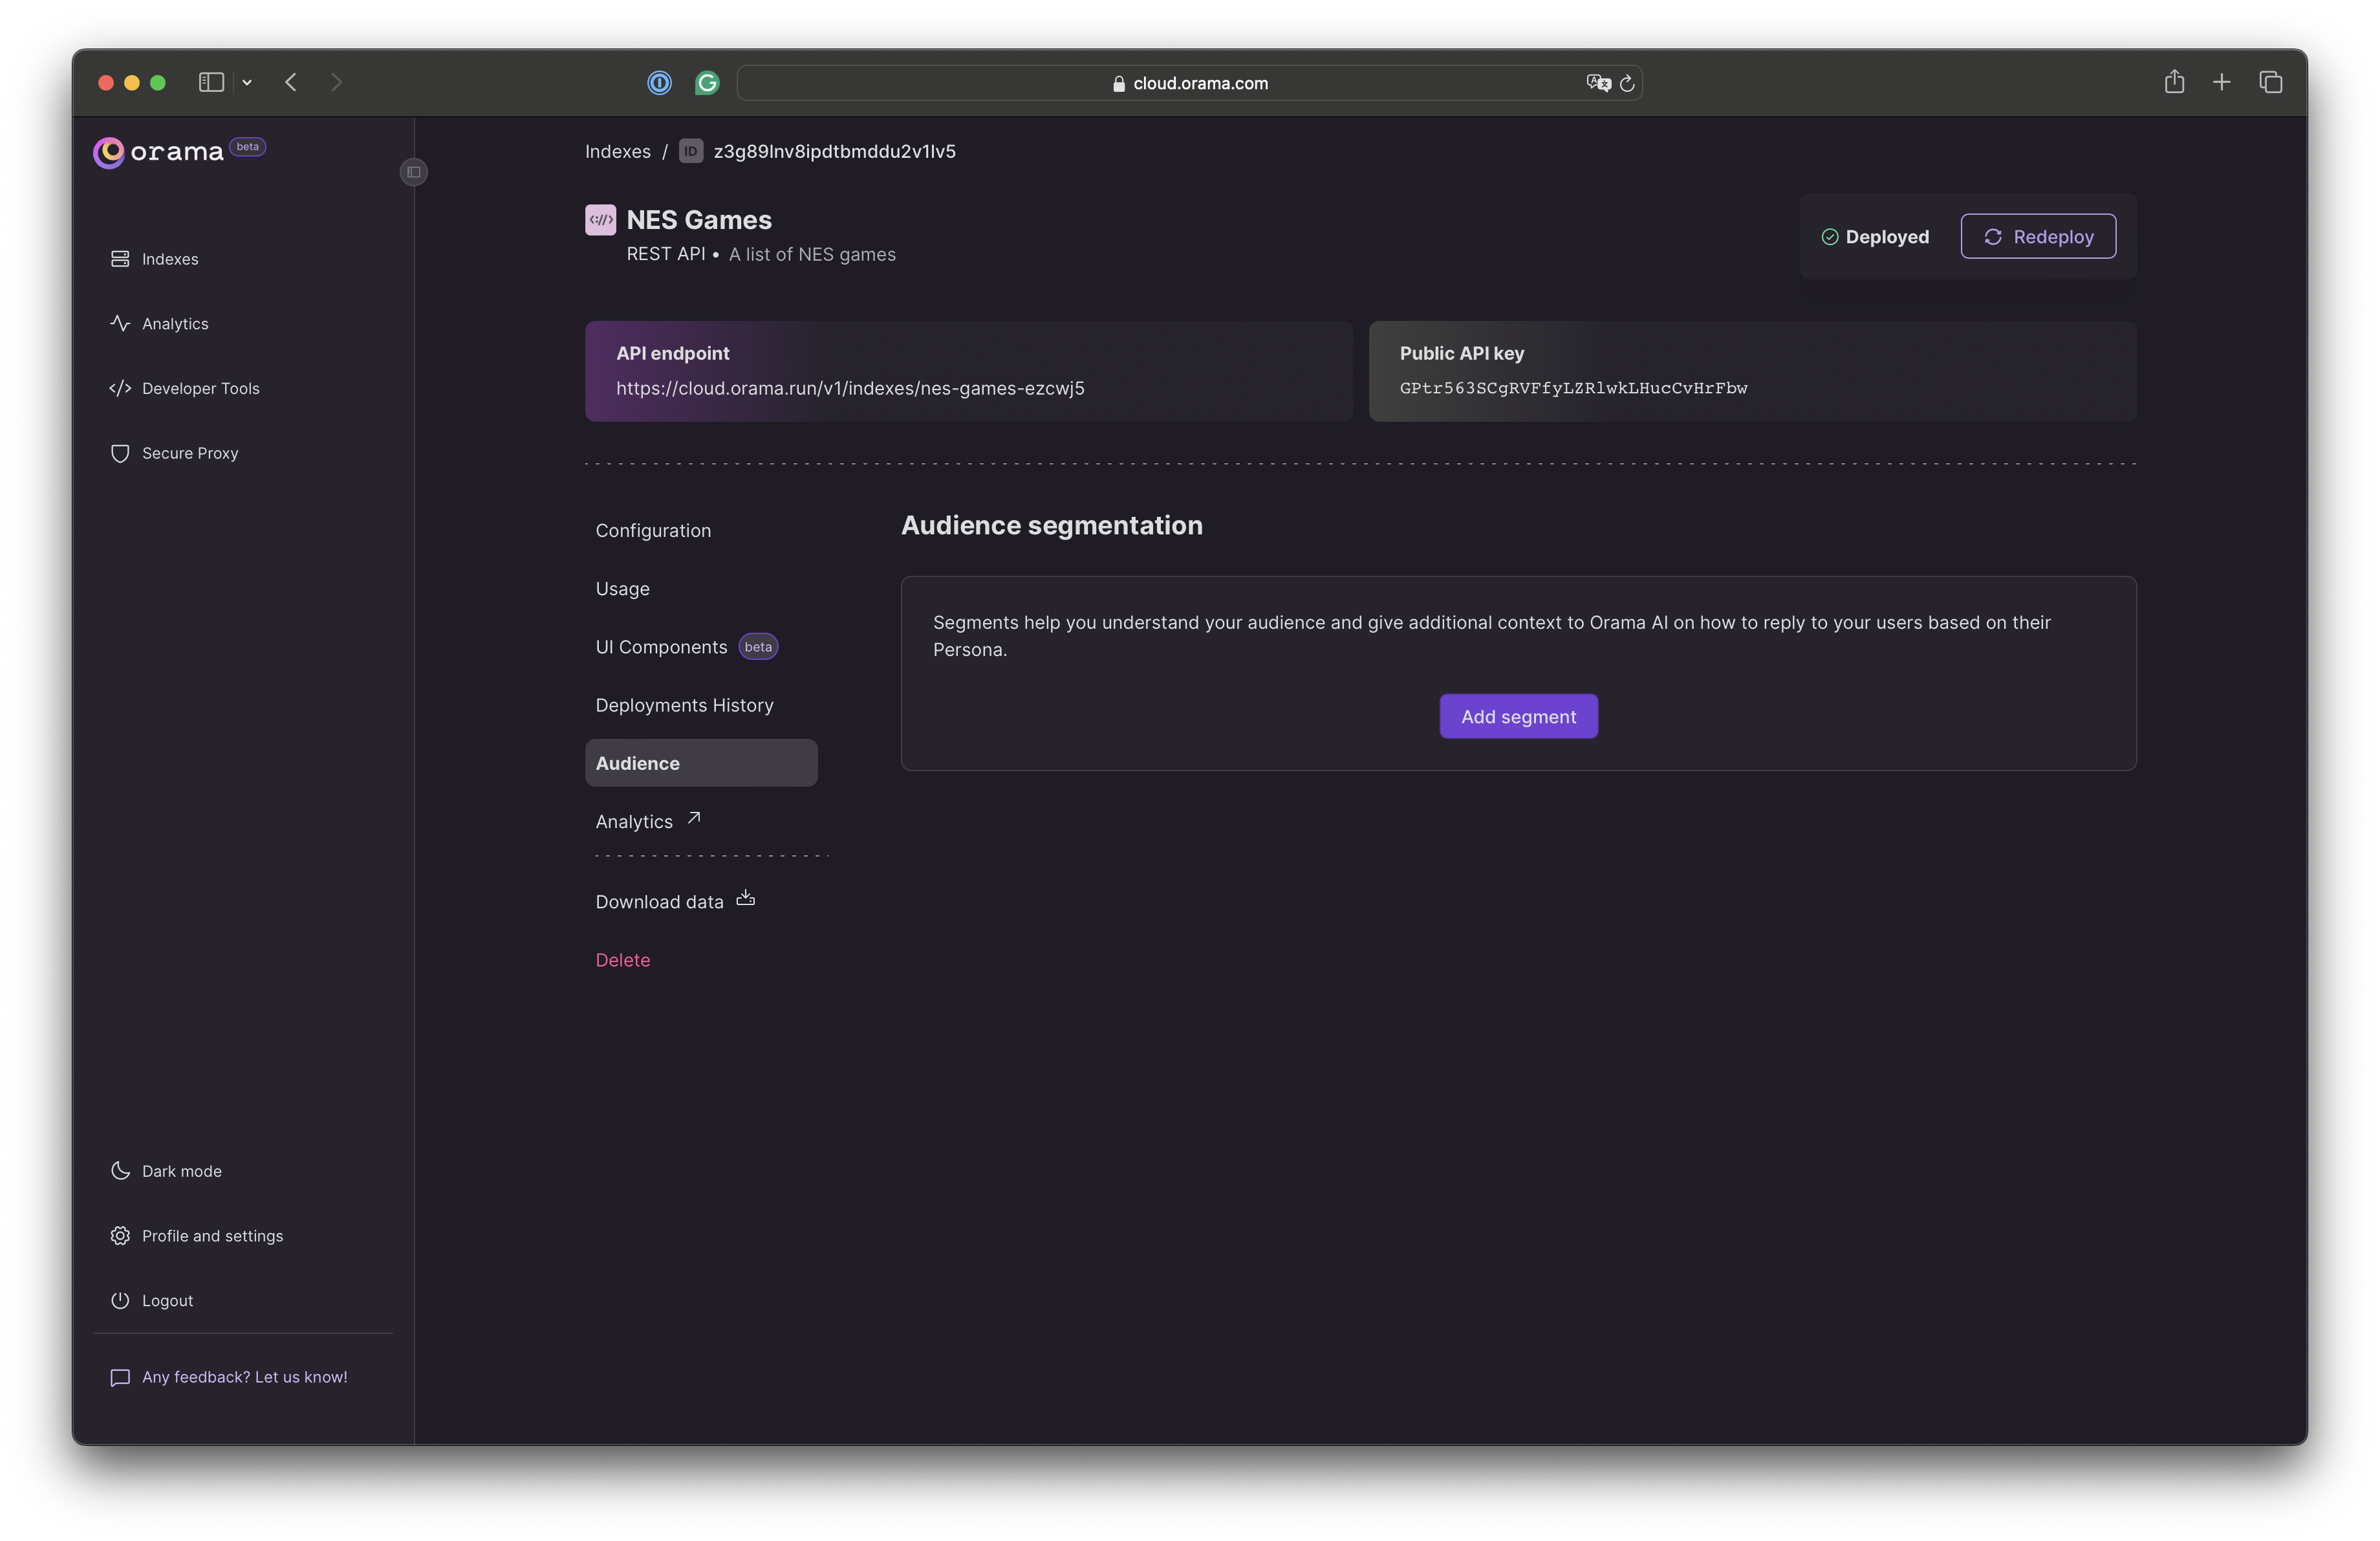
Once you have your index set up, this is what you’ll see:

On the left side, you’ll see the “audience” tab. Click on it to start creating your segments.

Creating new segments
Depending on your plan, you can create more or fewer segments and triggers:
| Plan | Number of segments | Number of triggers |
|---|---|---|
| Free | 3 | 3 per index |
| Hobby | 5 | 10 per index |
| Pro | 10 | 50 per index |
| Premium | 25 | 100 per index |
| Enterprise | Unlimited | Unlimited |
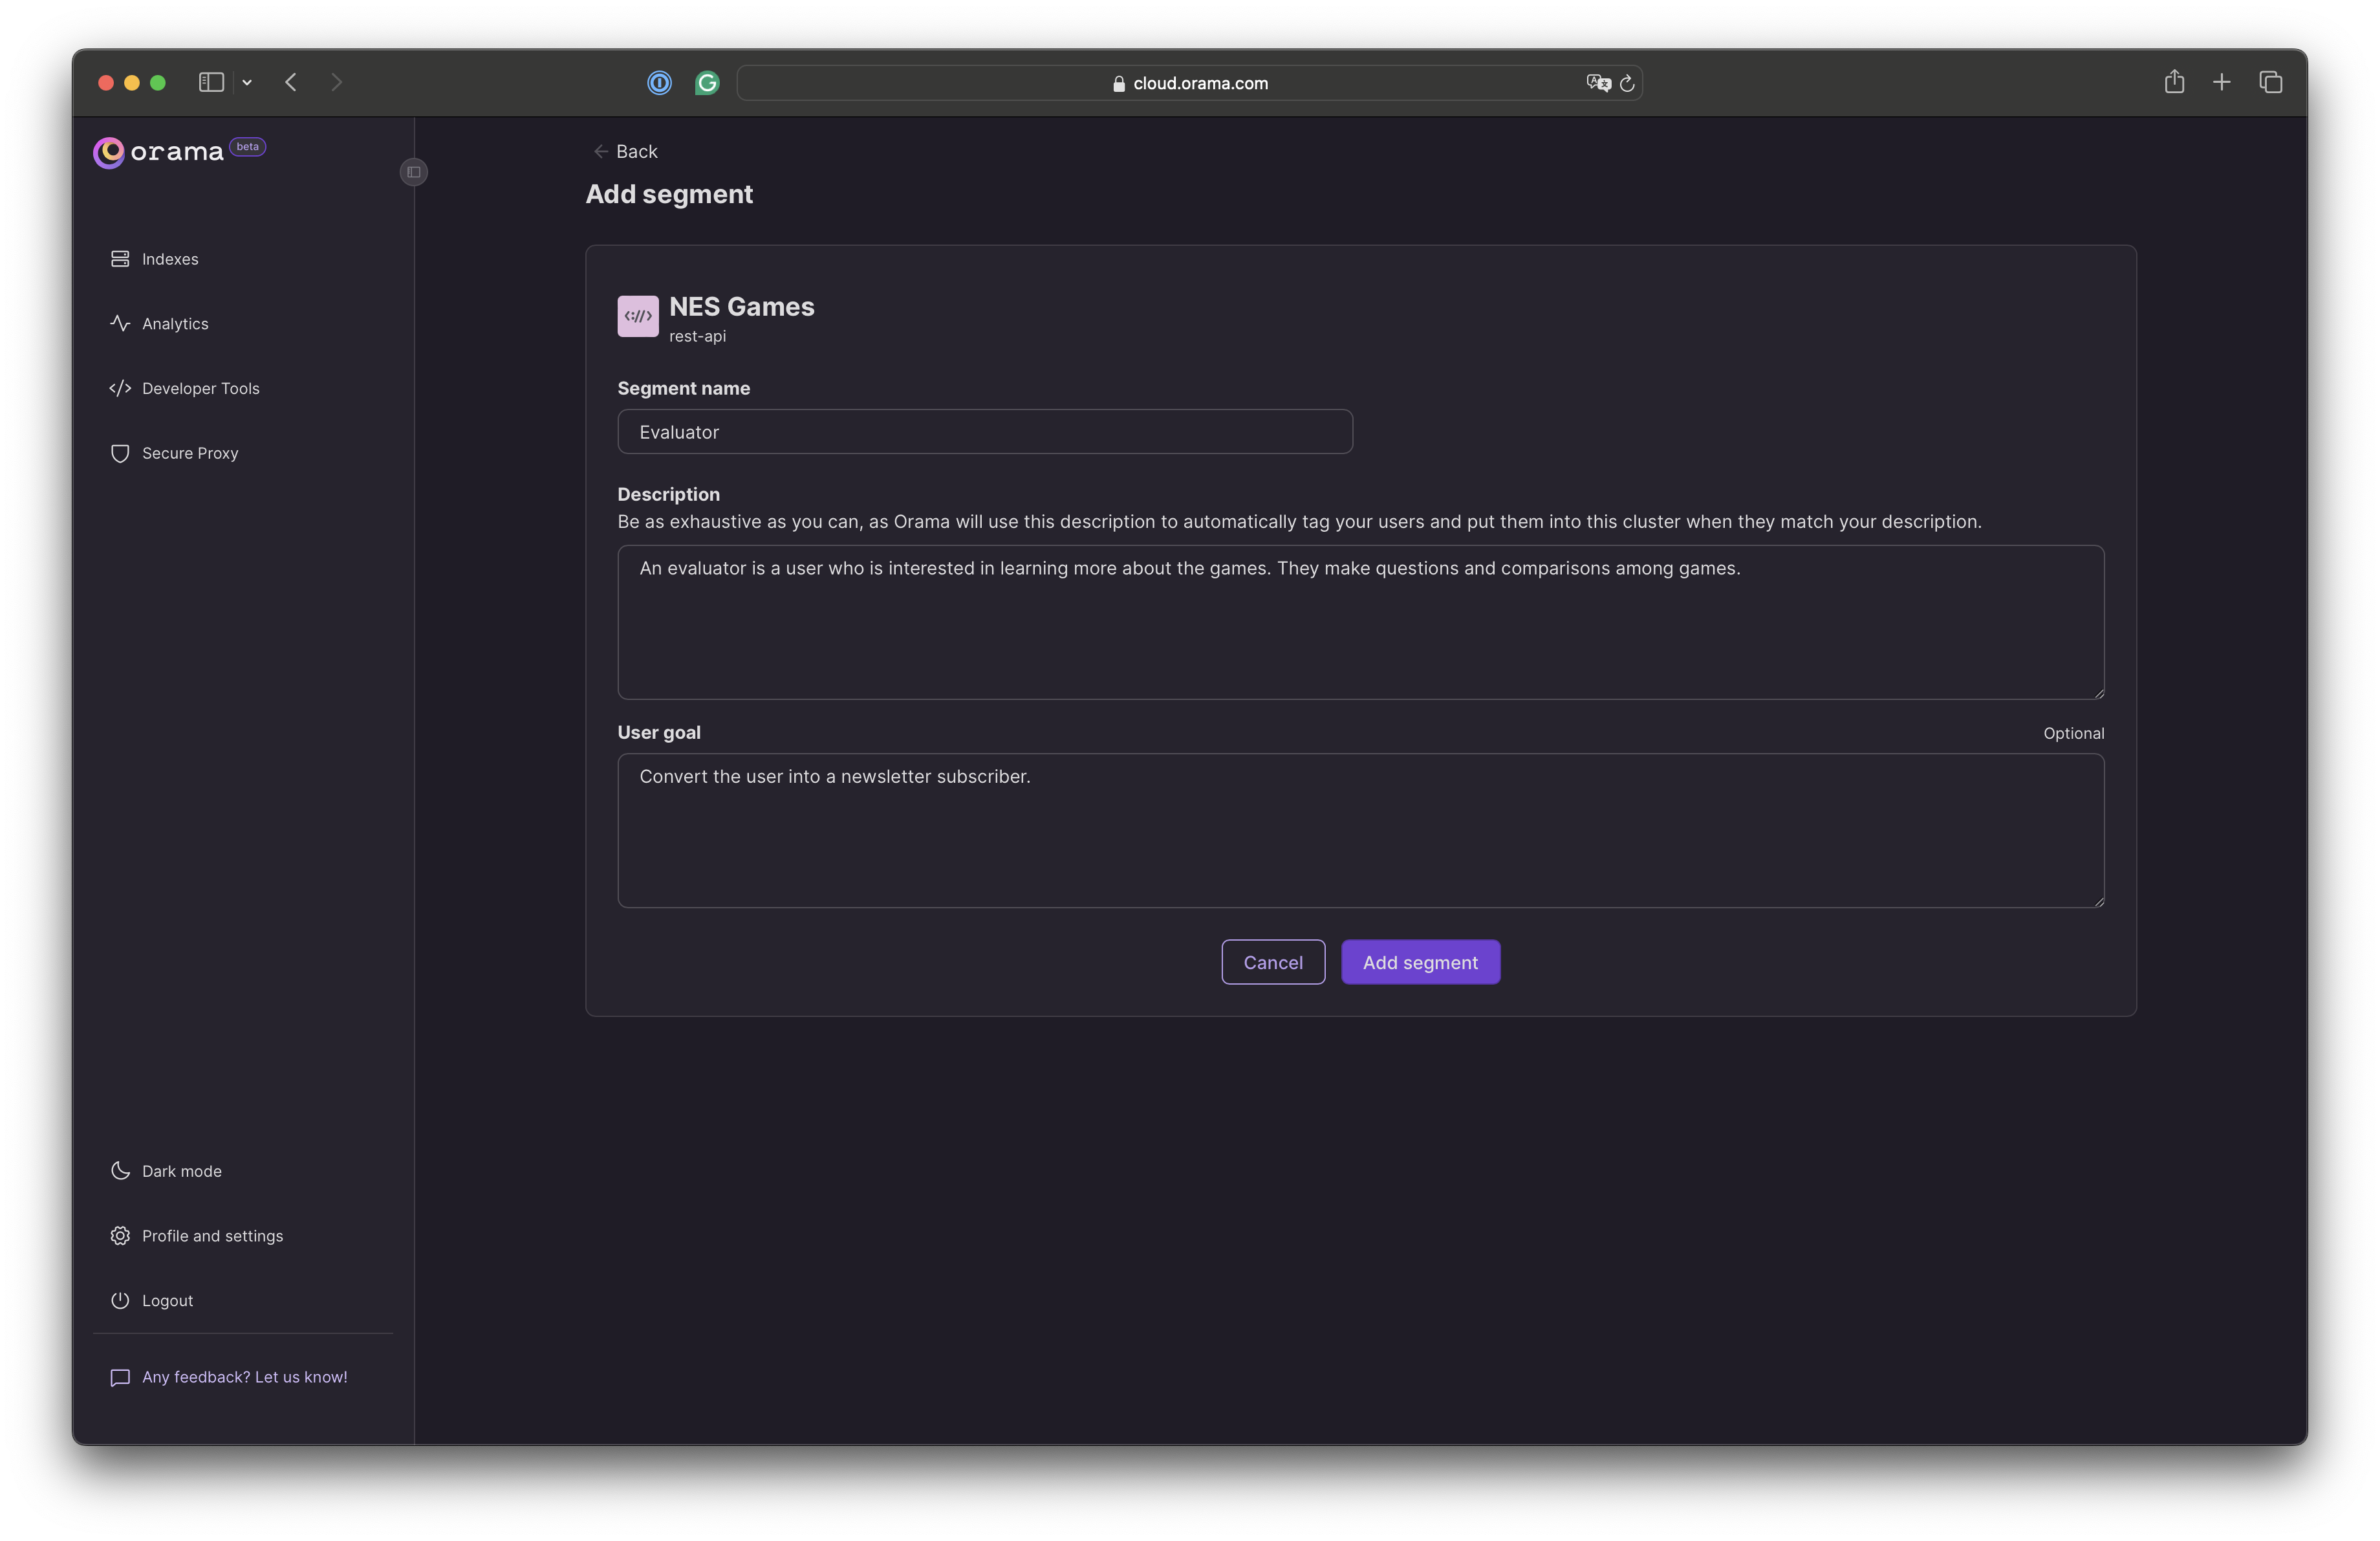
Let’s start by creating the Evaluator segment. Here we will write an exhaustive description of the segment, including the user’s behavior and attributes. Remember, the more detailed the description, the better you can target your users.
We will also write a goal for the segment. This will help Orama understand how to drive the conversation based on the user’s behavior. For example, if the user is an Evaluator, we want to provide them with more information about the games and try to convert them into Buyers or prompt them to subscribe to a newsletter.

Once we’ve created the Evaluator segment, we can start creating the Buyer segment. Here we will write a different description and goal for the segment. Once we’ve created the Buyer segment, we can move on to the Gamer segment, and eventually, this is how the dashboard will look like:

Now that we have our segments set up, we can start creating triggers to target users based on their behavior. We’ll cover triggers in the next guide.